How to Clean and Oil Your Sewing Machine: Easy Steps
Cleaning and oiling a sewing machine takes about 20 to 30 minutes, costs under $10 for supplies, and rates as easy. You’ll keep it running smoothly by using the right steps to clean and lubricate the machine. The one thing you must have before starting is sewing machine oil — never use household oils or sprays.
What you need to clean a sewing machine
You don’t need special tools to do this job. Everything here fits in a small box, and you probably own half of it already. If you’re missing something, grab it before you start so you don’t leave the machine open while you search.
| Item | How much | Why it’s needed | A substitute |
|---|---|---|---|
| Sewing machine oil | 2 to 3 drops total | Lubricates moving metal parts safely | none — don’t swap this |
| Small lint brush | 1 brush | Sweeps dust from tight spaces | Clean makeup brush |
| Screwdriver | 1 small flathead | Removes the needle plate | none — don’t swap this |
| Soft cloth | 1 piece | Wipes excess oil away | Paper towel |
| Tweezers | 1 pair | Pulls out stuck thread bits | Small needle |
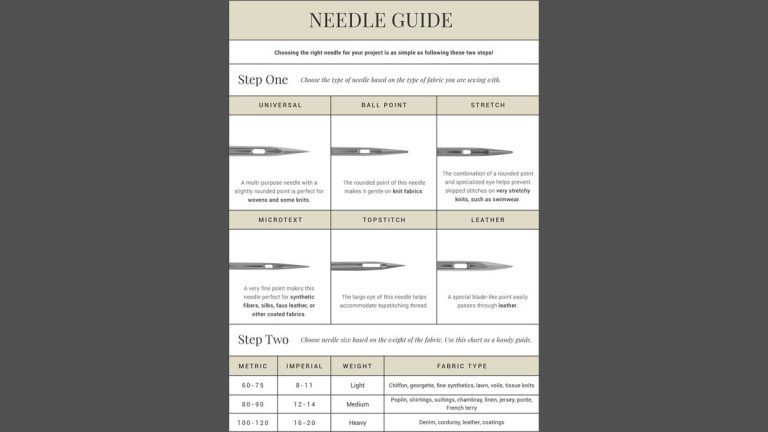
| New needle | 1 size for fabric | Prevents skipped stitches after cleaning | none — don’t swap this |
Before you clean your sewing machine
Prep work stops damage. Skipping these steps is exactly how people bend needles or jam gears.
- Turn off the power switch and unplug the cord from the wall outlet completely.
- Remove the needle, presser foot, bobbin, and bobbin case from the machine.
- Lift the presser foot lever so the tension discs stay open during cleaning.
- Lay a soft cloth under the machine to catch falling lint and stray oil drops.
- Check your manual’s diagram for oil points; if your model says “self-lubricating,” don’t add oil — take it to an authorized dealer instead.
The preparation step people skip most often is unplugging the machine. Hitting the foot pedal by accident while your fingers are near the needle bar can cause a bad injury. Opening the main motor housing or touching internal wiring requires a trained technician, so stop at the bobbin area and needle plate.
Steps to clean and oil your machine

-
Take off the needle plate using your screwdriver. Set the screws in a small cup so they don’t roll off the table. You’ll know this worked when the feed dogs and bobbin area are fully exposed.
-
Brush loose lint from the feed dogs using your small brush. Stroke outward, away from the machine’s center, for about 30 seconds. Stop when the metal teeth look bare and clear.
-
Pull out the bobbin case if your machine has a removable one. Wipe its inside and outside edges with a dry cloth. It’s ready when no fuzz clings to the metal surface.
-
Use tweezers to grab any thread wrapped around the hook race or bobbin post. Don’t pull hard enough to scratch the metal. The space is clear when you can spin the handwheel without catching.
-
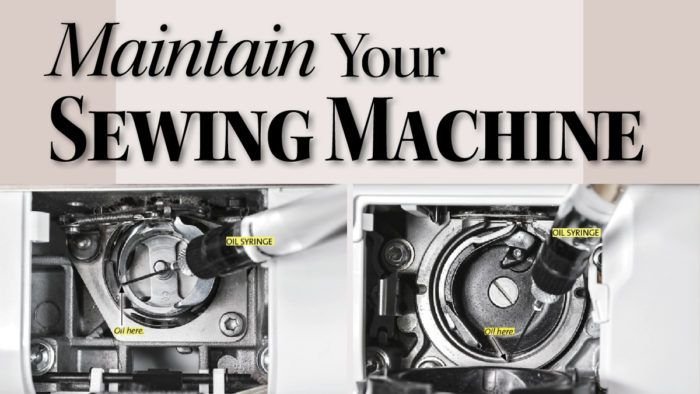
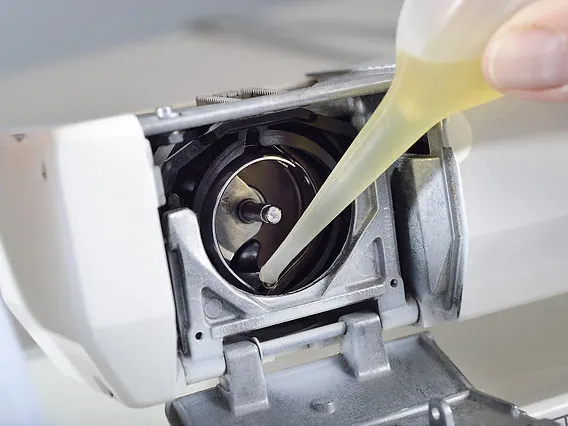
Apply exactly 1 drop of sewing machine oil onto the hook race where the bobbin sits. For top-loading machines that specify self-oiling parts, skip this step and check your brand’s manual.
-
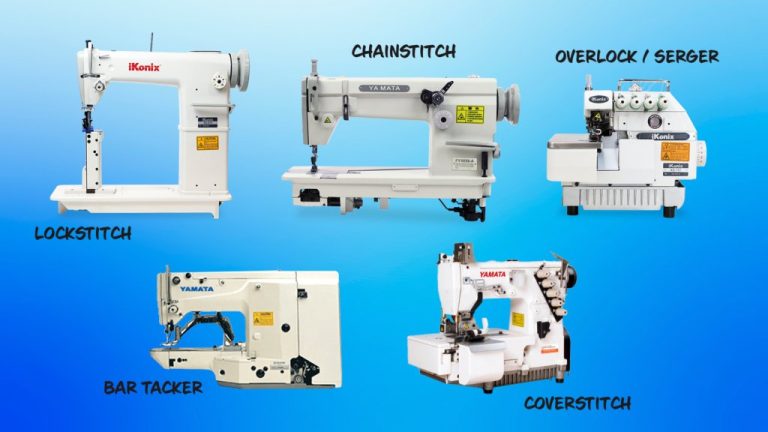
Add 1 more drop to any other spot your manual marks for oiling. This assumes a standard home machine; industrial models have extra points listed in their service guides.
-
Turn the handwheel toward you slowly for 10 full rotations. This spreads the oil evenly across the metal parts. You’ll feel the wheel turn smoother than before.
-
Wipe away every bit of excess oil with your soft cloth. Oil left on the surface will stain your next project. The metal should look dry but feel slightly slick.
-
Put the bobbin case back in, then screw the needle plate down snugly. Don’t force the screws past the point where they sit flush. Test by spinning the handwheel once more.
-
Insert a new needle and plug the machine back in. Run it without thread for 15 seconds on a scrap fabric piece. The stitching should be even and quiet.
Using cooking oil or WD-40 instead of real sewing machine oil ruins the plastic gears inside modern machines. That single swap leads to expensive repairs because those products dry into a sticky glue.
Signs your sewing machine is clean
A freshly oiled machine runs quietly. You won’t hear grinding or squeaking when you press the pedal. The handwheel should spin freely without sticking at any point in its rotation.
Test the result by sewing two layers of cotton for about 10 inches. The stitches should be even on both sides, with no skipped gaps or puckered fabric. If the thread still breaks or loops underneath, you missed a spot.
Check the bobbin area again. If you see gray fuzz packed between the metal teeth, repeat the brushing step. The exact amount of lint that builds up depends on your fabric type and hours of sewing, so read the bobbin area yourself rather than guessing by time alone. Synthetic fabrics shed less, while fleece fills the gears fast.
If the noise doesn’t change after oiling, the problem isn’t dirt. Stop there and take the machine to a repair shop.
Troubleshooting sewing machine problems
| What happened | Why | What to do |
|---|---|---|
| Thread keeps breaking | Tension disc has lint | Clean discs with folded cloth |
| Loud grinding noise | Gear lacks oil or damaged | Add one drop; see technician |
| Needle hits plate | Plate installed crooked | Realign and tighten screws |
| Fabric won’t move | Feed dogs clogged with fuzz | Brush teeth until completely bare |
| Oil stains fabric | Excess oil wasn’t wiped | Wipe again; sew on scrap first |
| Handwheel feels stiff | Thread jammed in hook | Remove bobbin; clear with tweezers |
How often to oil your machine

Oil your machine after every 8 to 10 hours of active sewing. This assumes standard cotton or polyester thread on a basic home model. Two things change that schedule faster than anything else: the fabric you sew and the environment you work in.
Sewing thick fleece, felt, or denim creates heavy lint, which means you should cut that interval in half and clean after 4 to 5 hours. Working in a dusty room or near pet hair does the same thing.
If you only sew for 10 minutes once a month, oiling at intervals that depend on your use prevents the existing lubricant from drying out, and the owner’s manual is the authority. Always check your specific manual, since some newer computerized models seal their gears and don’t take user-applied oil at all.
Related guides
- How Do You Know If Your Sewing Machine Needs Oil: Essential Tips
- Best Oil for Bernina 880 Sewing Machine: Top Lubricants Reviewed
- How to Use Sewing Machine Oil: Essential Tips for Smooth Stitching
Frequently asked questions
Can I use baby oil on my sewing machine?
No, baby oil leaves a sticky residue that gums up the gears. Only use oil labeled specifically for sewing machines. Household oils break down differently and attract more dust. Buying a small bottle of proper oil costs just a few dollars and saves expensive repairs later.
Why is my sewing machine making a loud noise?
Loud noises usually mean friction from missing oil or a heavy lint buildup. Clean the bobbin area first, then apply one drop of oil to the hook race. If the grinding sound stays after cleaning, a gear might be worn out and needs professional repair.
How long does cleaning a sewing machine take?
A basic clean and oil takes 20 to 30 minutes for a standard home machine. Removing the needle plate, brushing the lint, and wiping the oil accounts for most of that time. Complex computerized models might take slightly longer if they have extra covers to remove.
Is it safe to oil a computerized sewing machine?
Only if the manual explicitly tells you where to put the oil. Many computerized models have sealed bearings that don’t need user lubrication. Adding oil to the wrong spot can short out circuit boards. Check your specific manual or contact the manufacturer before adding any drops.
What happens if I don’t oil my sewing machine?
Metal parts rubbing together without oil wear down quickly. You’ll notice stiffer movement, louder operation, and eventually broken gears. Replacing a seized hook race or timing gear costs far more than a bottle of oil. Neglect shortens the machine’s working life significantly.
Does it matter what brand of oil I buy?
Yes, you need high-quality oil made for high-speed metal parts. Cheap hardware store oils often contain additives that damage plastics or leave gummy deposits. Stick to brands recommended by your machine’s manufacturer. The label should clearly state it’s safe for sewing machine mechanisms.
How many drops of oil does a sewing machine need?
One drop per oil point is enough for a standard home machine. Using more doesn’t protect better; it just leaks onto your fabric. Most machines have one or two designated spots near the bobbin hook. Check your manual’s diagram to find the exact number of points for your model.
Conclusion
Keeping your machine free of lint and properly lubricated stops small issues from turning into expensive repairs. Take your time with each step, especially when removing screws or handling the bobbin hook. A quiet, smooth-running machine makes sewing enjoyable again, and it’ll handle your projects without fighting you on every seam.
{“@context”:”https://schema.org”,”@type”:”FAQPage”,”mainEntity”:[{“@type”:”Question”,”name”:”Can I use baby oil on my sewing machine?”,”acceptedAnswer”:{“@type”:”Answer”,”text”:”No, baby oil leaves a sticky residue that gums up the gears. Only use oil labeled specifically for sewing machines. Household oils break down differently and attract more dust. Buying a small bottle of proper oil costs just a few dollars and saves expensive repairs later.”}},{“@type”:”Question”,”name”:”Why is my sewing machine making a loud noise?”,”acceptedAnswer”:{“@type”:”Answer”,”text”:”Loud noises usually mean friction from missing oil or a heavy lint buildup. Clean the bobbin area first, then apply one drop of oil to the hook race. If the grinding sound stays after cleaning, a gear might be worn out and needs professional repair.”}},{“@type”:”Question”,”name”:”How long does cleaning a sewing machine take?”,”acceptedAnswer”:{“@type”:”Answer”,”text”:”A basic clean and oil takes 20 to 30 minutes for a standard home machine. Removing the needle plate, brushing the lint, and wiping the oil accounts for most of that time. Complex computerized models might take slightly longer if they have extra covers to remove.”}},{“@type”:”Question”,”name”:”Is it safe to oil a computerized sewing machine?”,”acceptedAnswer”:{“@type”:”Answer”,”text”:”Only if the manual explicitly tells you where to put the oil. Many computerized models have sealed bearings that don’t need user lubrication. Adding oil to the wrong spot can short out circuit boards. Check your specific manual or contact the manufacturer before adding any drops.”}},{“@type”:”Question”,”name”:”What happens if I don’t oil my sewing machine?”,”acceptedAnswer”:{“@type”:”Answer”,”text”:”Metal parts rubbing together without oil wear down quickly. You’ll notice stiffer movement, louder operation, and eventually broken gears. Replacing a seized hook race or timing gear costs far more than a bottle of oil. Neglect shortens the machine’s working life significantly.”}},{“@type”:”Question”,”name”:”Does it matter what brand of oil I buy?”,”acceptedAnswer”:{“@type”:”Answer”,”text”:”Yes, you need high-quality oil made for high-speed metal parts. Cheap hardware store oils often contain additives that damage plastics or leave gummy deposits. Stick to brands recommended by your machine’s manufacturer. The label should clearly state it’s safe for sewing machine mechanisms.”}},{“@type”:”Question”,”name”:”How many drops of oil does a sewing machine need?”,”acceptedAnswer”:{“@type”:”Answer”,”text”:”One drop per oil point is enough for a standard home machine. Using more doesn’t protect better; it just leaks onto your fabric. Most machines have one or two designated spots near the bobbin hook. Check your manual’s diagram to find the exact number of points for your model.”}}]}