Is a Cricut an Embroidery Machine? The Definitive Answer
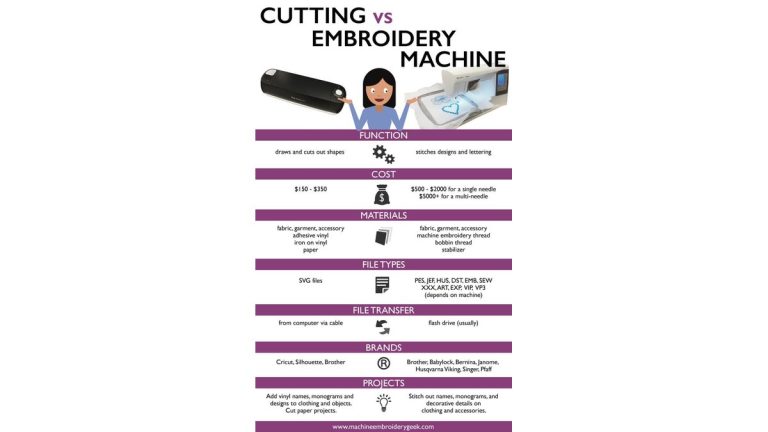
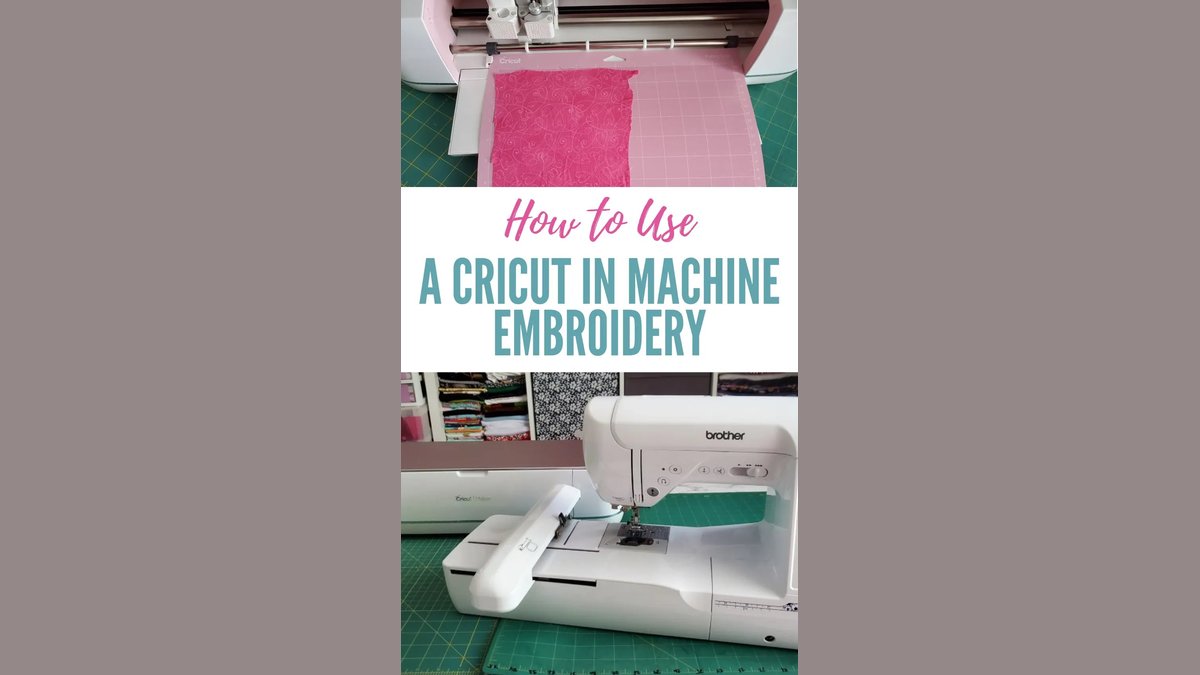
A cricut isn’t an embroidery machine because it uses a blade to cut materials rather than a needle to stitch thread through fabric. While you can use a Cricut machine to cut out fabric shapes for appliqué projects, it lacks the mechanical components, such as a bobbin case and a tension system, needed to create actual embroidery stitches.
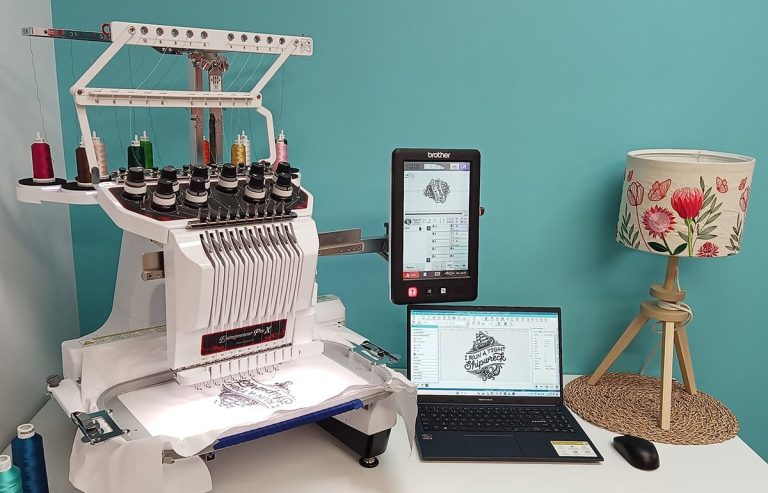
The main difference lies in the tool head. An embroidery machine has a specialized arm that moves a hoop in precise patterns while the needle moves up and down. A Cricut uses a carriage that moves a blade horizontally to slice through vinyl, paper, or fabric. If you try to use a Cricut for embroidery, you’ll simply end up with damaged fabric and a broken blade.
Understanding machine functions
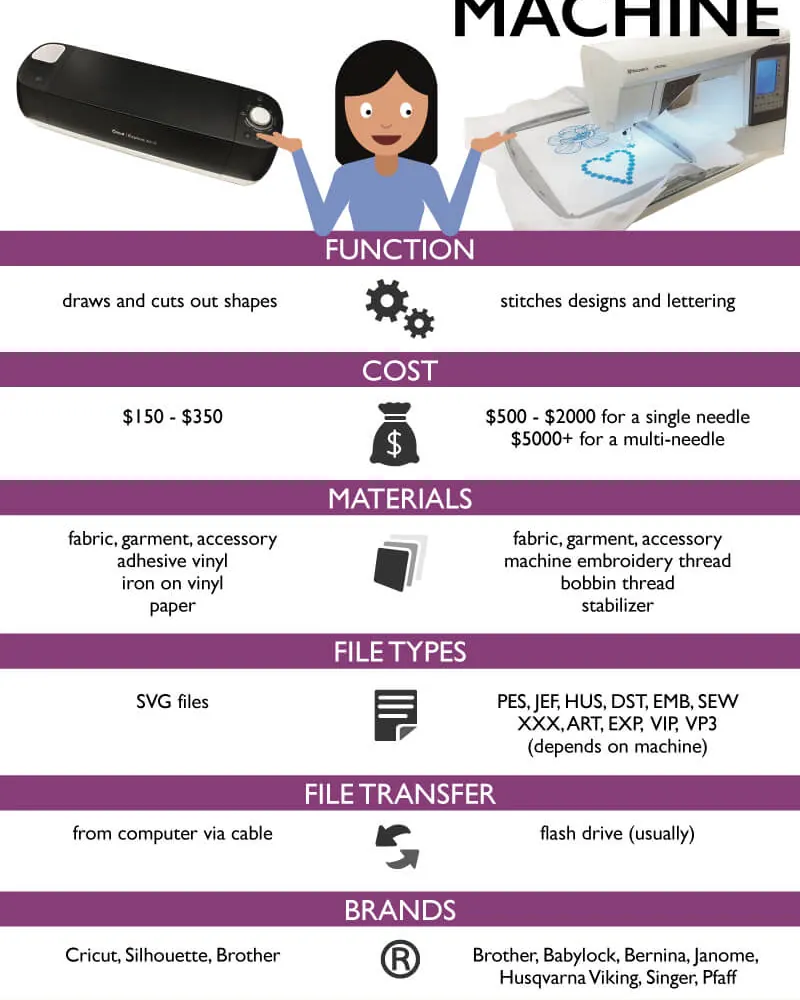
If you need to cut complex shapes from iron-on material or fabric for sewing projects, a cutting machine is perfect. However, if your goal is to add decorative stitching or lettering to a garment, you must use a dedicated embroidery machine.
A common mistake is thinking that “iron-on” designs are the same as embroidery. Iron-on vinyl is a heat-transfer material that sits on top of the fabric. Embroidery is a structural technique where thread becomes part of the fabric weave. Confusing these two results in projects that look different and behave differently after washing.
Using a Cricut instead of an embroidery machine
Place your fabric onto a fabric-grip mat, ensuring it’s smooth and free of wrinkles. Use a brayer to press the fibers firmly into the adhesive. This step prevents the fabric from shifting or bunching under the blade during the cutting process.
Use a rotary blade for thin fabrics like cotton or silk to prevent fraying at the edges. If you’re working with bonded fabric, which includes a heat-activated stabilizer, a standard fine-point blade works better.
Select the correct material setting in the software to ensure the blade depth is appropriate for your specific fabric type. Cut the shapes out, then remove them carefully from the mat using tweezers to keep the edges clean.
Apply the cut fabric shapes to your base material using an iron or a heat press set to the temperature recommended by your fabric supplier.
Always perform a test cut on a scrap piece of fabric first. If the blade pulls at the threads, your mat isn’t sticky enough, or the blade is dull. Replace the blade immediately to avoid ruined material and wasted time.
Comparing machine capabilities

| Feature | Cricut Machine | Embroidery Machine |
|---|---|---|
| Primary tool | Cutting blade | Sewing needle |
| Main output | Cut shapes | Stitched designs |
| Material attachment | Heat-transfer adhesive | Thread and bobbin |
| Software focus | Vector paths | Stitch density and files |
If your project is taking too long to cut, check that you’re using the correct mat for the material. Using a heavy-duty mat for thin fabric can make removal difficult and slow down your workflow significantly.
Choose a Cricut if your goal is creating clean, sharp edges on paper, vinyl, or leather. These machines excel at one-off projects where speed and precision matter most. If your work requires complex textures or permanent, high-durability branding on apparel, an embroidery machine is the necessary investment.
A common mistake is assuming these machines share the same learning curve. Cricut software relies on simple vector paths, while embroidery requires managing stitch density and tension settings. If you’re a beginner, start with a cutting machine to master basic design layouts. If you need to produce professional-grade patches or custom logos, move directly to embroidery software to avoid wasting expensive stabilizers and thread.
How to tell if it’s done
The cut is finished when the machine returns to its home position and the software alerts you on your screen. Don’t pull the mat away immediately. Instead, use a weeding tool to gently lift a small corner of your material. If the blade has cut all the way through without scoring the mat, your settings are perfect.
If the material remains attached to the backing, leave the mat loaded in the machine. Press the “Go” button to perform a second pass. This extra cycle often clears stubborn fibers that a single pass missed.
A common mistake is removing the mat before checking the cut. Once you eject the mat, the material loses its registration, making a second pass impossible to align perfectly. If you find the blade has cut through the mat surface, reduce your pressure setting by 10 units for the next project to preserve your equipment.
Mistakes that ruin your fabric

Using a dull blade creates jagged edges and pulled threads that compromise the structural integrity of your weave. Replace your blade the moment you notice the machine struggling to finish a cut in a single pass. If you hear a faint tearing sound during the process, your blade is already too blunt to manage the fibers safely.
Wrong mat pressure ruins delicate textiles instantly. If your mat is too sticky, the adhesive will leave permanent residue or tear the fabric upon removal. If it lacks tack, the material shifts mid-cut, resulting in distorted shapes. Use a dedicated fabric-grip mat for every project. If you’re working with lightweight silk or chiffon, apply a light layer of masking tape to the mat’s edges to reduce the initial grip strength.
Ignoring fabric prep is the most common cause of wasted material. Failing to iron your fabric flat before placement forces the blade to catch on microscopic wrinkles, which leads to snagging. Always starch your fabric before cutting if it has a loose weave. This provides the necessary rigidity to ensure the blade glides cleanly across the surface without bunching.
Frequently asked questions
Can a Cricut add text to a shirt?
Yes, a Cricut can add text to a shirt by cutting letters out of iron-on vinyl. You design the text in the software, cut it out, and then use a heat press to bond the vinyl to the garment. This is a common way to personalize clothing, but it’s technically a heat-transfer process rather than embroidery.
How long does a fabric cut take?
A standard fabric cut usually takes 3 to 7 minutes depending on the complexity of the design. Intricate patterns with many small details require more time because the blade must move slowly to maintain precision. Simple shapes, like basic squares or circles, will finish much faster. Always check your software’s estimated time before you start the cut.
Is it safe to use a Cricut with thick fabric?
Yes, it’s safe as long as you use the correct blade and material setting for your specific fabric thickness. If the fabric is too thick for your machine, the motor may strain or the blade may jam. Check the machine’s user manual to see the maximum thickness allowed for your specific model before you begin cutting.
What happens if I use a regular blade for fabric?
If you use a regular blade instead of a rotary blade, the fabric will likely bunch up and tear. A regular blade is designed for paper and vinyl, which are rigid enough to resist the blade’s drag. Fabrics are flexible and require a rolling rotary blade to slice through the fibers cleanly without pulling or fraying them.
Can I embroider with a Cricut Maker?
No, you can’t embroider with a Cricut Maker because it lacks the necessary sewing mechanism. While the Maker is a powerful cutting machine capable of working with many materials, it doesn’t have a needle, bobbin, or hoop system. You can use it to prepare fabric pieces for hand embroidery, but the machine itself can’t perform the embroidery stitches.
How often should I change my blade?
You should change your blade every 3 to 6 months if you cut fabric regularly. The exact time depends on how many projects you complete and the type of fabric you use. If you notice the blade snagging or failing to cut cleanly through the material, it’s time for a new one regardless of the time elapsed.
Conclusion
If you’re interested in adding texture to your crafts, look into iron-on vinyl or fabric markers for a simpler way to decorate. These tools don’t require complex stitching, and they’ll give your projects a professional, finished look. You’ll find that experimenting with these alternatives is a fun way to expand your creative skills.
{“@context”:”https://schema.org”,”@type”:”FAQPage”,”mainEntity”:[{“@type”:”Question”,”name”:”Can a Cricut add text to a shirt?”,”acceptedAnswer”:{“@type”:”Answer”,”text”:”Yes, a Cricut can add text to a shirt by cutting letters out of iron-on vinyl. You design the text in the software, cut it out, and then use a heat press to bond the vinyl to the garment. This is a common way to personalize clothing, but it’s technically a heat-transfer process rather than embroidery.”}},{“@type”:”Question”,”name”:”How long does a fabric cut take?”,”acceptedAnswer”:{“@type”:”Answer”,”text”:”A standard fabric cut usually takes 3 to 7 minutes depending on the complexity of the design. Intricate patterns with many small details require more time because the blade must move slowly to maintain precision. Simple shapes, like basic squares or circles, will finish much faster. Always check your software’s estimated time before you start the cut.”}},{“@type”:”Question”,”name”:”Is it safe to use a Cricut with thick fabric?”,”acceptedAnswer”:{“@type”:”Answer”,”text”:”Yes, it’s safe as long as you use the correct blade and material setting for your specific fabric thickness. If the fabric is too thick for your machine, the motor may strain or the blade may jam. Check the machine’s user manual to see the maximum thickness allowed for your specific model before you begin cutting.”}},{“@type”:”Question”,”name”:”What happens if I use a regular blade for fabric?”,”acceptedAnswer”:{“@type”:”Answer”,”text”:”If you use a regular blade instead of a rotary blade, the fabric will likely bunch up and tear. A regular blade is designed for paper and vinyl, which are rigid enough to resist the blade’s drag. Fabrics are flexible and require a rolling rotary blade to slice through the fibers cleanly without pulling or fraying them.”}},{“@type”:”Question”,”name”:”Can I embroider with a Cricut Maker?”,”acceptedAnswer”:{“@type”:”Answer”,”text”:”No, you can’t embroider with a Cricut Maker because it lacks the necessary sewing mechanism. While the Maker is a powerful cutting machine capable of working with many materials, it doesn’t have a needle, bobbin, or hoop system. You can use it to prepare fabric pieces for hand embroidery, but the machine itself can’t perform the embroidery stitches.”}},{“@type”:”Question”,”name”:”How often should I change my blade?”,”acceptedAnswer”:{“@type”:”Answer”,”text”:”You should change your blade every 3 to 6 months if you cut fabric regularly. The exact time depends on how many projects you complete and the type of fabric you use. If you notice the blade snagging or failing to cut cleanly through the material, it’s time for a new one regardless of the time elapsed.”}}]}