Sewing Machine Presser Foot: Definitions and Usage Explained
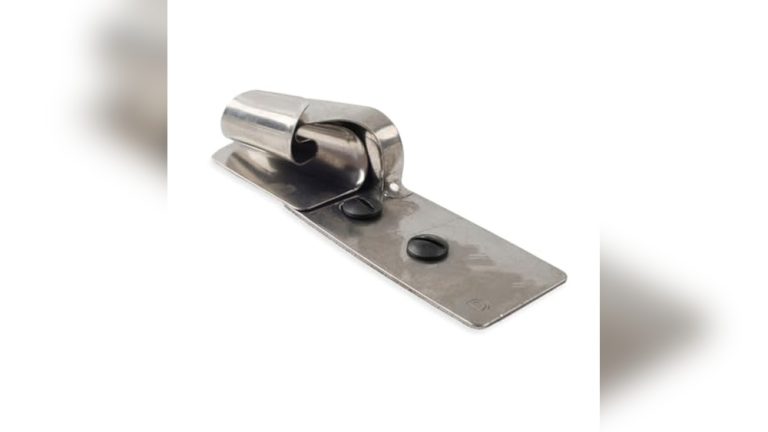
The terms sewing machine presser foot or presser foot describe the exact same metal or plastic attachment that holds fabric against the feed dogs. Whether you call it by the full name or the shortened version depends only on how much detail you need to convey. Both names are correct and refer to the piece that determines how the machine moves material.
Understanding your sewing machine presser foot

The presser foot holds fabric against the feed dogs to ensure consistent stitch length. Without this downward pressure, your needle will pull the material into the throat plate, causing a jammed bobbin case.
Check your machine’s shank height before buying replacements. Measure the distance from the center of the screw hole to the bottom of the foot while it’s in the lowered position. If that distance is roughly half an inch, you need a low-shank foot. Anything closer to an inch requires high-shank components.
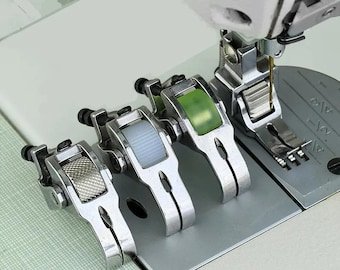
Use a Teflon foot for sticky materials like vinyl or leather, as steel feet will drag and ruin the finish. If you’re quilting multiple layers, switch to a walking foot. It features integrated feed dogs that move the top layer of fabric at the same speed as the bottom, preventing the dreaded puckering that occurs when layers shift during long, straight seams.
Why names for this part vary
The component is officially called a presser foot in every manufacturer manual, but the shorter term is common in daily speech. Because the part sits directly under the needle, the name describes its function of “pressing” the fabric to ensure even stitches. You’ll often hear seasoned sewers drop the first two words because the context of the machine makes the meaning clear.
The mechanical purpose of this part is to apply downward pressure on the fabric layers. This pressure works with the feed dogs—the metal teeth underneath the needle plate—to move the fabric forward at a consistent speed. According to technical specifications from the University of Kentucky, maintaining the correct pressure is vital for preventing skipped stitches and puckering. If the pressure is too light, the fabric won’t move, but if it’s too heavy, it may damage delicate materials.
You don’t need to worry about which term you use when shopping for replacements or parts. Retailers and repair shops recognize both labels immediately. The real difference to watch for is the “shank” height of your machine, which dictates how the foot attaches. A low-shank machine is the most common for home use, while high-shank models are usually found on industrial or professional-grade sewing equipment.
When the attachment type changes

| Machine Type | Shank Height | Attachment Method |
|---|---|---|
| Standard Home | Low shank | Snap-on |
| Heavy Duty | High shank | Screw-on |
| Older Vintage | Slant shank | Specialized screw |
| Industrial | Industrial shank | Fixed screw |
| Embroidery | Electronic | Sensor-based snap |
Measure your shank height by lowering the presser foot and measuring from the center of the screw hole to the bottom of the foot. If that distance is roughly 1/2 inch, you have a low shank machine. Anything approaching 1 inch indicates a high shank model.
Never force a snap-on foot onto a screw-on shank. Doing so risks snapping the plastic housing or bending the metal needle bar. If the foot doesn’t click into place with minimal pressure, stop immediately. Check your manual for the specific shank compatibility code. Using the wrong attachment type will cause the needle to strike the foot, resulting in a broken needle or timing damage.
How to attach a foot properly
- Raise the needle to its highest position by turning the handwheel toward you. This ensures the needle doesn’t hit the foot during the change.
- Lift the presser foot lever at the back of the machine to release the current foot. If it’s a screw-on type, loosen the thumbscrew until the foot drops away.
- Align the new foot under the presser bar. For snap-on styles, lower the bar until the notch clicks into place; for screw-on styles, tighten the thumb screw firmly by hand.
- Check the alignment by manually turning the handwheel one full rotation. Ensure the needle passes through the center of the opening without touching the metal or plastic sides.
- Lower the foot onto a scrap piece of fabric to test the tension. If the fabric doesn’t feed evenly, check that the foot is clicked or screwed in fully.
- Adjust the pressure dial on your machine if the fabric is very thick or very thin. Most machines have a number scale; use a lower number for thin silk and a higher number for heavy denim.
The mistakes that ruin your stitch

Forcing a foot onto a different shank type can bend the needle bar or break the needle itself. Always check the machine manual for your specific shank height—low, high, or slant—before attaching a new foot.
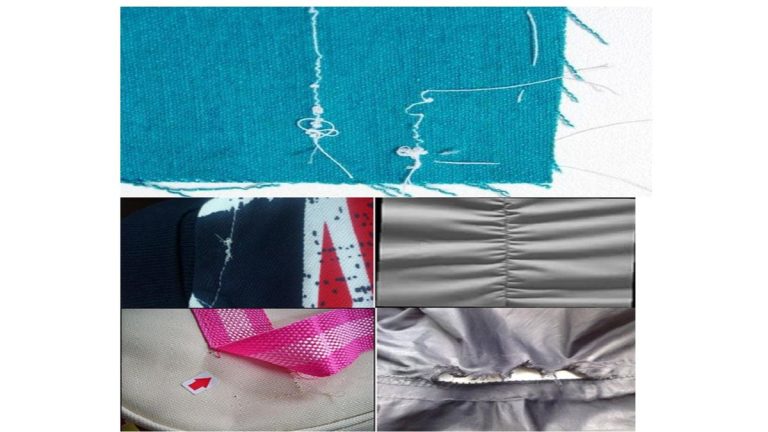
Leaving the presser foot in the down position while threading the machine prevents the thread from entering the tension disks correctly. This leads to loose, looping stitches on the underside of your fabric. If your seam looks messy, re-thread with the foot raised to engage the disks.
Using a plastic foot on high-heat settings can warp the material and cause the fabric to snag during sewing. Reserve plastic feet for delicate, thin materials that require a light touch.
Failing to tighten the attachment screw completely can cause the foot to fall off mid-stitch and damage the feed dogs. Give the screw a firm, final turn after every change.
Frequently asked questions
Can I use a universal foot on any machine?
No, a universal foot only fits machines with the same shank height and mounting style. While many snap-on feet are interchangeable between brands like Brother or Janome, they won’t fit high-shank industrial machines. Always check your manual to confirm the shank height before you buy a new set of feet.
How long does a presser foot last?
A metal presser foot can last for many years, but plastic ones may show wear after 500 hours of sewing. If you see deep scratches or burrs on the bottom of the foot, it’s time to replace it. These rough spots catch on fabric and cause uneven stitches or thread breakage during your projects.
Is it safe to sew without a presser foot?
No, it’s never safe or effective to sew without one because the fabric won’t feed properly. The foot provides the necessary friction to pull the material under the needle in time with the feed dogs. Without it, your stitches will be irregular, and you risk the needle catching the fabric and pulling it into the throat plate.
What happens if the foot is too tight?
If the pressure is too high, the foot will leave permanent marks on delicate fabrics like velvet or leather. You should adjust the pressure dial on the top or side of your machine to a lighter setting when working with these materials. If your machine lacks a pressure dial, reduce the amount of fabric you’re feeding to prevent bunching.
Does it matter if the foot is metal or plastic?
Yes, the material matters because metal feet provide more durability for heavy projects, while plastic feet are often used for specialized tasks like invisible zippers. Some plastic feet are designed to be “non-stick” for sewing vinyl or leather. Choose the material based on the weight and type of fabric you’re currently using.
Why is my fabric bunching under the foot?
Fabric bunching usually happens because the pressure is too high or the needle is dull. Check your pressure dial first and lower it to a setting of 1 or 2 for lightweight cottons. If the problem continues, change your needle, as a blunt tip often pulls fabric down into the machine’s internal mechanism rather than piercing it cleanly.
Conclusion
Choosing the right tool for your machine is the best way to ensure professional results. Always double-check your machine’s shank height before buying new attachments to avoid compatibility issues. When you maintain these parts with regular cleaning and proper storage, they will serve you well for years of creative work.
{“@context”:”https://schema.org”,”@type”:”FAQPage”,”mainEntity”:[{“@type”:”Question”,”name”:”Can I use a universal foot on any machine?”,”acceptedAnswer”:{“@type”:”Answer”,”text”:”No, a universal foot only fits machines with the same shank height and mounting style. While many snap-on feet are interchangeable between brands like Brother or Janome , they won’t fit high-shank industrial machines. Always check your manual to confirm the shank height before you buy a new set of feet.”}},{“@type”:”Question”,”name”:”How long does a presser foot last?”,”acceptedAnswer”:{“@type”:”Answer”,”text”:”A metal presser foot can last for many years, but plastic ones may show wear after 500 hours of sewing. If you see deep scratches or burrs on the bottom of the foot, it’s time to replace it. These rough spots catch on fabric and cause uneven stitches or thread breakage during your projects.”}},{“@type”:”Question”,”name”:”Is it safe to sew without a presser foot?”,”acceptedAnswer”:{“@type”:”Answer”,”text”:”No, it’s never safe or effective to sew without one because the fabric won’t feed properly. The foot provides the necessary friction to pull the material under the needle in time with the feed dogs. Without it, your stitches will be irregular, and you risk the needle catching the fabric and pulling it into the throat plate.”}},{“@type”:”Question”,”name”:”What happens if the foot is too tight?”,”acceptedAnswer”:{“@type”:”Answer”,”text”:”If the pressure is too high, the foot will leave permanent marks on delicate fabrics like velvet or leather. You should adjust the pressure dial on the top or side of your machine to a lighter setting when working with these materials. If your machine lacks a pressure dial, reduce the amount of fabric you’re feeding to prevent bunching.”}},{“@type”:”Question”,”name”:”Does it matter if the foot is metal or plastic?”,”acceptedAnswer”:{“@type”:”Answer”,”text”:”Yes, the material matters because metal feet provide more durability for heavy projects, while plastic feet are often used for specialized tasks like invisible zippers. Some plastic feet are designed to be \”non-stick\” for sewing vinyl or leather. Choose the material based on the weight and type of fabric you’re currently using.”}},{“@type”:”Question”,”name”:”Why is my fabric bunching under the foot?”,”acceptedAnswer”:{“@type”:”Answer”,”text”:”Fabric bunching usually happens because the pressure is too high or the needle is dull. Check your pressure dial first and lower it to a setting of 1 or 2 for lightweight cottons. If the problem continues, change your needle, as a blunt tip often pulls fabric down into the machine’s internal mechanism rather than piercing it cleanly.”}}]}