
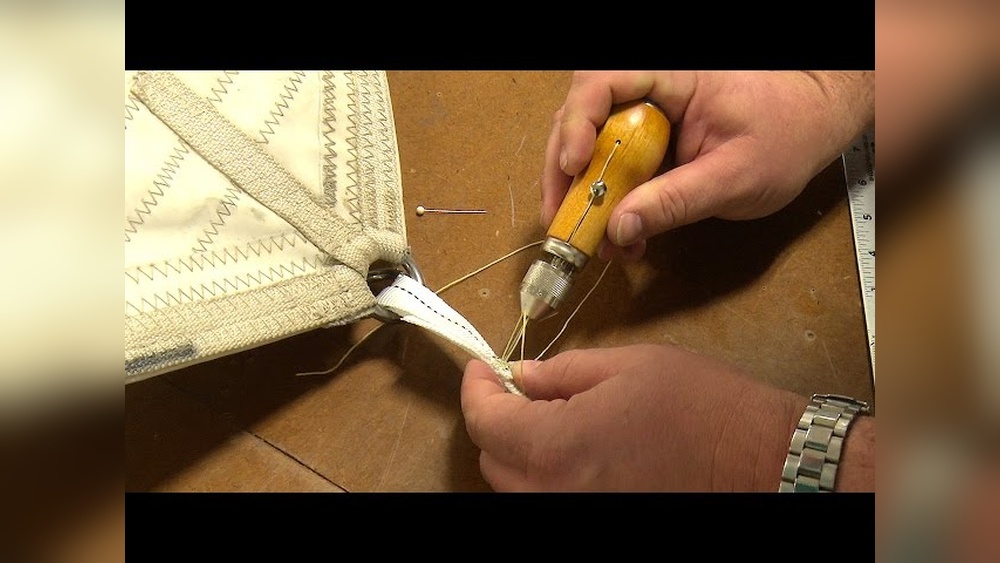
How To Sew Webbing By Hand
Are you struggling to sew webbing by hand and unsure where to start? Whether you’re fixing a backpack strap or creating your own gear, knowing how to sew webbing properly can save you time and money.
You’ll discover simple, step-by-step techniques that anyone can follow—even if you’ve never sewn webbing before. By the end, you’ll feel confident handling tough materials and making strong, lasting stitches that hold up under pressure. Keep reading to master the skills that will make your projects look professional and reliable every time.

Credit: www.core77.com
Tools Needed
Sewing webbing by hand needs specific tools for good results. Choosing the right tools helps make the job easier and the stitches strong. Start with understanding the types of webbing you have. Then, gather the essential sewing supplies. This way, you prepare well for your project.
Types Of Webbing
Webbing comes in many materials and widths. Common types include nylon, polyester, and cotton. Nylon is strong and slightly stretchy. Polyester resists water and sun damage well. Cotton webbing feels soft but is less durable. Choose webbing based on your project’s needs. The type affects the needle and thread you should use.
Essential Sewing Supplies
Hand sewing webbing needs sturdy needles. Use heavy-duty or leather needles for thick webbing. Regular needles might bend or break. Choose strong thread like polyester or nylon thread. These types hold up to stress and wear. Scissors or a rotary cutter help cut webbing cleanly. A thimble can protect your finger while pushing the needle. Pins or clips hold webbing pieces together for sewing. A measuring tape ensures precise cuts and stitch placement.
Preparing The Webbing
Preparing the webbing is the first step in sewing it by hand. Proper preparation helps the sewing process go smoothly. It also keeps the webbing strong and neat. Taking time to prepare the webbing correctly saves effort later. Two main tasks stand out: measuring and cutting, and sealing the edges.
Measuring And Cutting
Measure the webbing carefully before cutting. Use a ruler or tape measure for accuracy. Mark the length with a pencil or chalk. Cut straight across with sharp scissors. A clean, straight cut prevents fraying and keeps the project tidy. Avoid jagged or uneven edges that cause problems when sewing.
Sealing The Edges
Sealing the edges stops the webbing from fraying. Use a lighter or candle flame to melt synthetic webbing edges. Hold the cut edge near the flame quickly, without burning it. For natural fibers, use fabric glue or fray check. Sealed edges stay neat and last longer during use.
Choosing The Right Stitch
Choosing the right stitch is important when sewing webbing by hand. The stitch must hold the webbing firmly and last long under pressure. Different stitches offer different strengths and uses. Picking the right one helps you finish your project with confidence.
Running Stitch
The running stitch is simple and fast to sew. It goes in and out of the fabric in a straight line. This stitch works well for light loads or temporary fixes. It is not very strong, so avoid using it for heavy-duty webbing.
Backstitch
The backstitch is stronger than the running stitch. It creates a solid line of stitches by overlapping each stitch backward. This stitch holds webbing tightly and can support more weight. Use the backstitch for medium-strength needs or repairs.
Box Stitch
The box stitch is the strongest choice for webbing. It forms a square or rectangle with an X inside. This pattern spreads the load evenly and prevents the webbing from tearing. The box stitch is perfect for heavy-duty straps and safety gear.
Credit: www.sailrite.com
Hand Sewing Techniques
Hand sewing webbing requires careful technique to ensure strong, neat stitches. Proper methods help the webbing hold together under stress. Focus on three key steps for best results.
These hand sewing techniques will make your work easier and more durable. Follow each step slowly and practice for steady hands.
Threading The Needle
Choose a strong thread that matches your webbing color. Cut a length about 18 inches long. Too long thread can tangle easily.
Use a needle with a sharp point and a large eye. Wet the tip of the thread slightly. This helps it slide through the needle eye.
Hold the needle steady and push the thread through the eye. Pull enough thread so you have a short tail to secure later.
Securing The Starting Point
Start by making a small knot at the end of your thread. Push the needle through the webbing from the back side.
Pull the thread until the knot stops it on the fabric. This keeps your stitches from slipping out.
Make a few tight stitches over the same spot to secure the thread well. This forms a strong base for your sewing.
Maintaining Even Tension
Pull the thread gently after each stitch. Avoid pulling too hard or too loose.
Even tension keeps stitches flat and prevents puckering in the webbing. It also strengthens the seam.
Check your work often. Adjust your pull to keep stitches consistent and smooth.
Step-by-step Sewing Process
Sewing webbing by hand takes patience and care. This step-by-step process helps you join webbing pieces securely. Follow each step closely for strong, lasting seams. The goal is to keep the webbing flat and stitches tight.
Aligning The Webbing
Start by placing the two webbing ends together. Make sure edges match perfectly. Keep the webbing flat on your work surface. Pin the layers to hold them in place. This prevents slipping as you sew. Proper alignment ensures even stitching later.
Stitching Along The Edge
Thread your needle with strong thread and knot the end. Begin sewing about half an inch from the edge. Use small, tight stitches to keep the webbing secure. Stitch straight along the edge, keeping tension even. This step joins the webbing firmly. Avoid loose or uneven stitches.
Reinforcing Stress Points
Stress points need extra strength to avoid tearing. Sew additional stitches in an X or box pattern at these spots. Focus on corners and ends of the webbing. This reinforcement adds durability and prevents damage. Double-check stitches for gaps or weak spots.
Tips For Durable Seams
Creating strong seams is key when sewing webbing by hand. Durable seams keep your project safe and long-lasting. Small details make a big difference in strength and appearance.
Follow these tips to sew webbing that holds up well. They help prevent tears and loose threads. Use these ideas to get better results every time.
Double Stitching
Double stitching adds extra strength to your seams. Sew the same line twice or stitch back and forth. This method helps the seam resist pulling and stretching.
Make sure stitches stay close and even. Avoid long gaps between stitches. Double stitching works well on heavy webbing materials.
Using Strong Thread
Choose a strong thread that matches the webbing. Polyester or nylon thread works best for durability. Thin or weak thread can break easily under stress.
Use a thread with a high tensile strength. This keeps seams intact through wear and tear. Thicker thread also helps fill gaps between stitches.
Avoiding Common Mistakes
Skip sewing over old holes; this weakens the seam. Use fresh fabric area for new stitches. Pull the thread tight but don’t stretch the webbing.
Keep the needle perpendicular to the webbing surface. This prevents uneven stitches and snags. Check thread tension often to avoid loose seams.
Finishing Touches
Finishing touches make your hand-sewn webbing strong and neat. These final steps keep your work safe and looking good. Focus on securing and cleaning up the thread.
Knotting And Securing Threads
Tie a small knot close to the webbing. Pull the knot tight to hold the thread firmly. For extra strength, make two or three knots. Hide the knot by pushing it under the webbing layers. This stops it from coming loose during use.
Trimming Excess Thread
Cut off extra thread close to the knot. Use sharp scissors for a clean cut. Leave a tiny bit of thread to prevent unraveling. Avoid cutting too close, or the knot may come undone. Trim threads on both sides for a tidy finish.

Credit: www.practical-sailor.com
Frequently Asked Questions
How Do You Start Sewing Webbing By Hand?
To start sewing webbing by hand, thread a strong needle with durable thread. Secure the end with a knot. Begin stitching with small, tight stitches along the webbing edge for strength and durability. Use a thimble for easier needle control.
What Type Of Thread Is Best For Hand Sewing Webbing?
Use heavy-duty polyester or nylon thread for hand sewing webbing. These threads offer strength and resistance to wear and tear. Avoid cotton thread as it weakens quickly. Strong thread ensures your sewn webbing holds securely under stress.
How Many Stitches Per Inch For Sewing Webbing?
Aim for 8 to 12 stitches per inch when sewing webbing by hand. This stitch density provides a sturdy hold and prevents fabric from fraying. Keep stitches even and close to the edge for the best results.
Can Hand Sewing Webbing Be As Strong As Machine Sewing?
Hand sewing webbing can be strong if done correctly with durable thread and tight stitches. However, machine stitching is generally stronger and faster. Hand sewing works well for repairs or small projects where machine use isn’t possible.
Conclusion
Sewing webbing by hand takes patience and simple tools. Follow each step carefully to get strong stitches. Keep your thread tight and use small, even stitches. Practice on scrap webbing before starting your main project. This helps you build confidence and improve your skills.
Hand sewing webbing works well for repairs or small jobs. With time, your work will look neat and last long. Try it yourself and see how rewarding it feels. Small efforts create sturdy results.


