Simple Sewing Machine for Hemming: A Guide to Easy Repairs
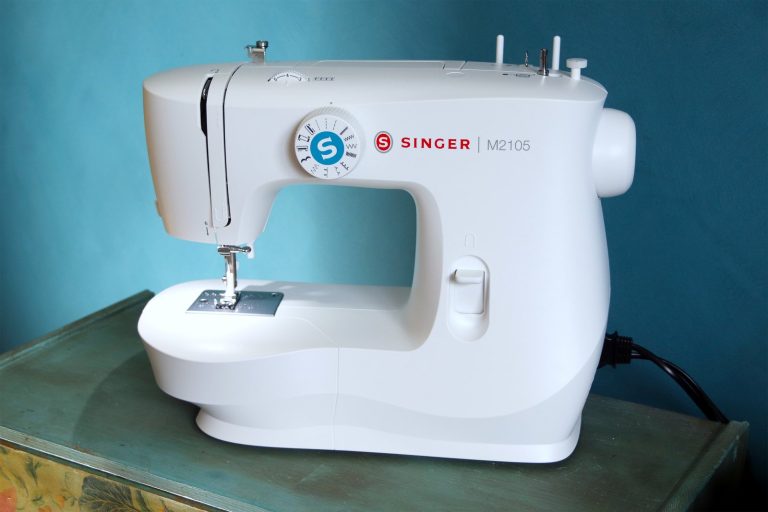
A mechanical model with a straight-stitch and zigzag function is the most reliable simple sewing machine for hemming for most home users because it provides consistent tension without complex digital menus. If you work with heavy denim or thick curtains, you should choose a machine with a high-clearance presser foot to prevent fabric bunching. This choice depends on the material thickness; for lightweight silk, you need a machine with adjustable presser foot pressure to avoid puckering the fabric.
Choosing a Simple Sewing Machine for Hemming

Choosing the right equipment depends on your specific projects and how often you plan to repair or shorten your garments.
| Method | How long | Effort | Cost | Best for |
|---|---|---|---|---|
| Mechanical Machine | 10 minutes | Low | Low | Daily repairs |
| Hand Stitching | 45 minutes | High | Zero | Delicate hems |
| Hemming Tape | 5 minutes | Low | Low | Quick fixes |
The table above assumes you’re working on a standard pair of cotton trousers. If you’re working with heavy-duty fabrics like canvas, you should allow for extra time to adjust your machine tension settings to avoid thread breakage. Note that mechanical machines require regular cleaning to maintain performance, whereas hemming tape is a temporary solution that may lose its bond after several cycles in a washing machine.
Basic mechanical machine operation
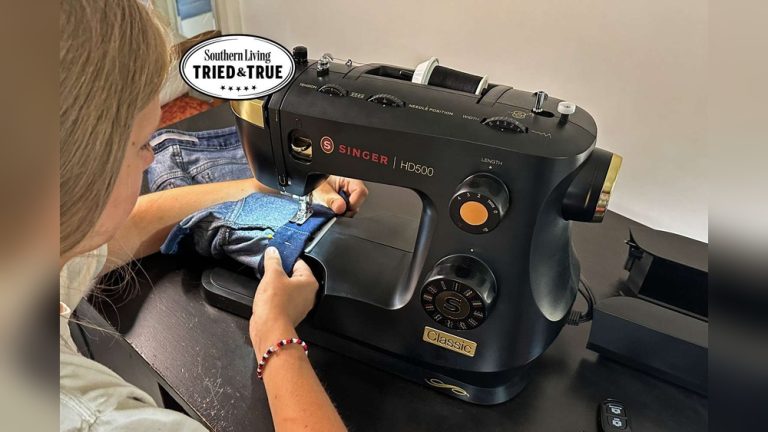
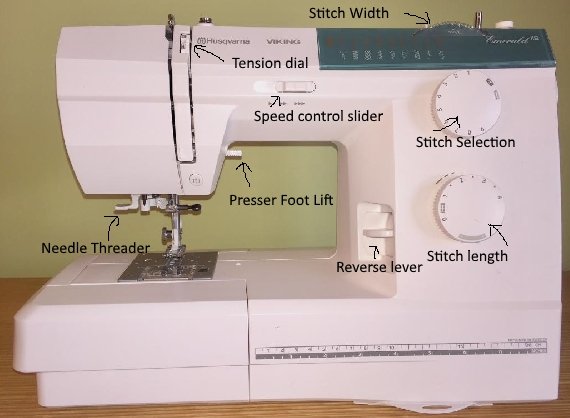
A mechanical machine uses a manual handwheel and physical dials, making it easier to troubleshoot than a computerized model.
- Set your stitch length dial to 2.5mm or 3.0mm, which is the standard range for most woven cotton fabrics.
- Align the fabric edge with the guide markings on the needle plate, typically keeping the fold exactly 5/8 inch from the edge.
- Lower the presser foot firmly onto the fabric before you press the foot pedal to begin the stitch.
- Backstitch at the start and end of your hem for about 1/2 inch to lock the threads securely in place.
- Trim the excess thread tails with sharp scissors once you have removed the fabric from the machine.
This method is excellent for creating clean, permanent finishes on jeans or skirts. The primary weakness is that it requires a flat, stable table surface to operate effectively. If your machine skips stitches, this often indicates that the needle is blunt or the wrong size for your fabric weight; checking the machine needle selection guidance from the manufacturer will help you match the correct point type to your material.
Manual needle and thread
Hand sewing provides the highest level of control for delicate items that can’t withstand the pressure of a motorized feed dog.
- Choose a thread color that matches your fabric and cut a length no longer than 18 inches to prevent tangling.
- Use a blind stitch or a simple whip stitch, inserting the needle at an angle to hide the thread inside the fold.
- Pull the thread through gently until you feel resistance, ensuring you don’t bunch or gather the fabric.
- Repeat the stitch every 1/4 inch, keeping your tension loose so the fabric can drape naturally.
- Tie a double knot at the end of your seam and bury the tail inside the hem allowance.
This method is perfect for high-end garments or silk where machine marks are undesirable. The limitation is the time required, as it’s significantly slower than using a machine. You should avoid this for long curtains or heavy bed sheets because the sheer length of the fabric makes it difficult to maintain even spacing over several feet.
Using iron-on adhesive strips
Hemming tape acts as a heat-activated glue that bonds two layers of fabric together without the need for needles or thread.
- Fold your fabric to the desired length and press the fold firmly with a hot iron to create a sharp crease.
- Place the adhesive tape inside the fold, ensuring it doesn’t overlap the edge of the fabric.
- Apply the iron directly to the fold for 10 seconds, using the steam setting if the fabric type allows it.
- Let the fabric cool completely for at least 2 minutes before you try to move it or wear the garment.
This is the fastest method for someone who lacks equipment or doesn’t want to learn complex techniques. Its main weakness is durability; the adhesive may peel away after repeated exposure to hot water or harsh laundry detergents. If you choose this method, check the care label on your clothing to ensure the fabric can withstand the high temperature required to melt the adhesive properly.
Which one should you use?
If you’re in a hurry, use hemming tape. It requires no setup time and provides a clean result in minutes, which is perfect for an emergency repair before an event.
If you’re doing this for the first time, start with a mechanical machine. The process is intuitive and allows you to practice on scrap fabric until you feel confident with the speed and stitch control. It’s much easier to correct a machine stitch by using a seam ripper than it’s to redo a long hand-sewn hem.
If you want the best possible result, use hand stitching. While it takes the longest, it allows for a “blind” finish that’s invisible from the outside. This level of detail is impossible to replicate with a standard machine, making it the choice for formal wear or expensive fabrics.
Remember the trade-off: machines offer speed and strength, while hand sewing offers precision and a professional aesthetic. Don’t attempt to use a machine on extremely delicate fabrics like chiffon, as the feed dogs can snag the material; for those cases, hand sewing is the only safe option to avoid damaging your garment.
The rules that apply whichever way you choose
Regardless of your chosen method, you must always prepare your fabric by washing and drying it first. This ensures any potential shrinkage happens before you hem, rather than after you have finished the work.
Always test your technique on a small scrap piece of the same fabric first. This simple step prevents you from making a mistake on the actual garment that could be difficult to fix later. If you’re using a mechanical machine, you must check that the bobbin is wound evenly; a loose or lumpy bobbin will cause the thread to jam inside the casing.
If you’re working with electrical equipment, never attempt to open the housing to perform repairs. A capacitor can hold a lethal charge even when the unit is unplugged, so any internal mechanical failure must be handled by a qualified service technician. At the end of the process, always press your final hem with an iron to set the stitches or the adhesive. This final step gives your work a crisp, store-bought look and ensures the fabric lies flat against the garment.
Frequently asked questions

Can I use a mini sewing machine for hemming?
Yes, you can use a mini machine for basic hemming, though they often lack the power to handle thick seams. These units are designed for light tasks and may struggle with denim. If your project involves thick material, a full-sized machine provides better control. Always check the maximum fabric thickness in your manual.
Why is my sewing machine thread bunching underneath?
This usually happens because the top tension is too loose or the bobbin is threaded incorrectly. When the top thread fails to pull the bobbin thread up, it creates a tangle on the underside. Re-thread both the spool and bobbin first. If the problem persists, increase your top tension dial one increment at a time.
How long does a hem take to finish?
A machine hem takes about 10 minutes, while hand sewing takes closer to 45 minutes for a standard pair of pants. These times assume you have already measured and pinned your hem. If you’re working on a complex hem shape, allow for an additional 20 minutes to manage the fabric curves.
Is it safe to leave a sewing machine plugged in?
No, you should always unplug your machine when you aren’t actively using it or changing the needle. Leaving it plugged in poses a risk if the foot pedal is bumped, causing the needle to move unexpectedly. Always turn off the power and remove the plug to ensure the machine remains inactive.
What happens if I sew over pins?
Sewing over pins can break your needle, damage your presser foot, or scratch the needle plate of your machine. When the needle hits a metal pin, the force can cause the needle to shatter or bend, which may send metal shards toward your eyes. Always stop your machine and remove each pin by hand as you approach it. This simple habit protects your equipment and ensures your safety during the sewing process.
Final Thoughts
Once you’ve picked your machine, try practicing on some scrap fabric before starting your actual project. It’s a great way to get comfortable with the foot pedal and speed control. You’ll feel much more confident when it’s time to finish those hems, so don’t be afraid to experiment with different settings.
{“@context”:”https://schema.org”,”@type”:”FAQPage”,”mainEntity”:[{“@type”:”Question”,”name”:”Can I use a mini sewing machine for hemming?”,”acceptedAnswer”:{“@type”:”Answer”,”text”:”Yes, you can use a mini machine for basic hemming, though they often lack the power to handle thick seams. These units are designed for light tasks and may struggle with denim. If your project involves thick material, a full-sized machine provides better control. Always check the maximum fabric thickness in your manual.”}},{“@type”:”Question”,”name”:”Why is my sewing machine thread bunching underneath?”,”acceptedAnswer”:{“@type”:”Answer”,”text”:”This usually happens because the top tension is too loose or the bobbin is threaded incorrectly. When the top thread fails to pull the bobbin thread up, it creates a tangle on the underside. Re-thread both the spool and bobbin first. If the problem persists, increase your top tension dial one increment at a time.”}},{“@type”:”Question”,”name”:”How long does a hem take to finish?”,”acceptedAnswer”:{“@type”:”Answer”,”text”:”A machine hem takes about 10 minutes, while hand sewing takes closer to 45 minutes for a standard pair of pants. These times assume you have already measured and pinned your hem. If you’re working on a complex hem shape, allow for an additional 20 minutes to manage the fabric curves.”}},{“@type”:”Question”,”name”:”Is it safe to leave a sewing machine plugged in?”,”acceptedAnswer”:{“@type”:”Answer”,”text”:”No, you should always unplug your machine when you aren’t actively using it or changing the needle. Leaving it plugged in poses a risk if the foot pedal is bumped, causing the needle to move unexpectedly. Always turn off the power and remove the plug to ensure the machine remains inactive.”}},{“@type”:”Question”,”name”:”What happens if I sew over pins?”,”acceptedAnswer”:{“@type”:”Answer”,”text”:”Sewing over pins can break your needle, damage your presser foot, or scratch the needle plate of your machine. When the needle hits a metal pin, the force can cause the needle to shatter or bend, which may send metal shards toward your eyes. Always stop your machine and remove each pin by hand as you approach it. This simple habit protects your equipment and ensures your safety during the sewing process.”}}]}