How to Use Sewing Machine Properly: Expert Tips for Flawless Stitching
Are you ready to unlock the full potential of your sewing machine? Knowing how to use your machine properly can save you time, prevent frustration, and help you create beautiful, lasting projects.
Whether you’re a beginner or looking to improve your skills, this guide will walk you through the essential steps to master your sewing machine with confidence. Keep reading to discover simple tips and tricks that will make every stitch smooth and every project a success.
Your next masterpiece is just a few clicks away!
Choosing The Right Sewing Machine
Choosing the right sewing machine is key for a smooth sewing experience. The perfect machine fits your needs and skill level. It helps you sew with ease and enjoy every project. Understanding different types and features guides you to the best choice.
Types Of Sewing Machines
Basic mechanical machines work well for simple stitches. They use knobs and dials for control. Electronic machines offer more stitch options and automatic features. Computerized machines provide precision and many built-in stitches. Each type suits different skill levels and project needs.
Features To Consider
Look for stitch variety to match your sewing tasks. A strong motor handles thick fabrics better. Adjustable speed helps control your sewing pace. An automatic needle threader saves time and effort. A clear display makes settings easy to read. Consider portability if you move your machine often.
Budget And Brand Options
Set a budget before shopping to narrow choices. Well-known brands often offer reliable machines and support. Cheaper models fit beginners or occasional use. Higher-end machines add durability and extra features. Compare prices and reviews to find the best fit.

Credit: www.stitchclinic.com
Setting Up Your Machine
Setting up your sewing machine correctly is the first step to successful sewing. Proper setup ensures smooth operation and prevents thread jams or fabric damage. Follow these clear steps to get your machine ready for use.
Assembling Components
Start by placing your sewing machine on a stable surface. Attach the needle securely into its holder. Fix the presser foot in place, matching it to your project needs. Ensure the spool pin holds the thread spool firmly. Check that all parts fit tightly and move smoothly.
Threading The Machine
Raise the needle to its highest position. Pass the thread through the thread guide. Follow the threading path marked on your machine. Pull the thread through the tension discs carefully. Guide it through the take-up lever and down to the needle. Thread the needle from front to back for best results.
Winding The Bobbin
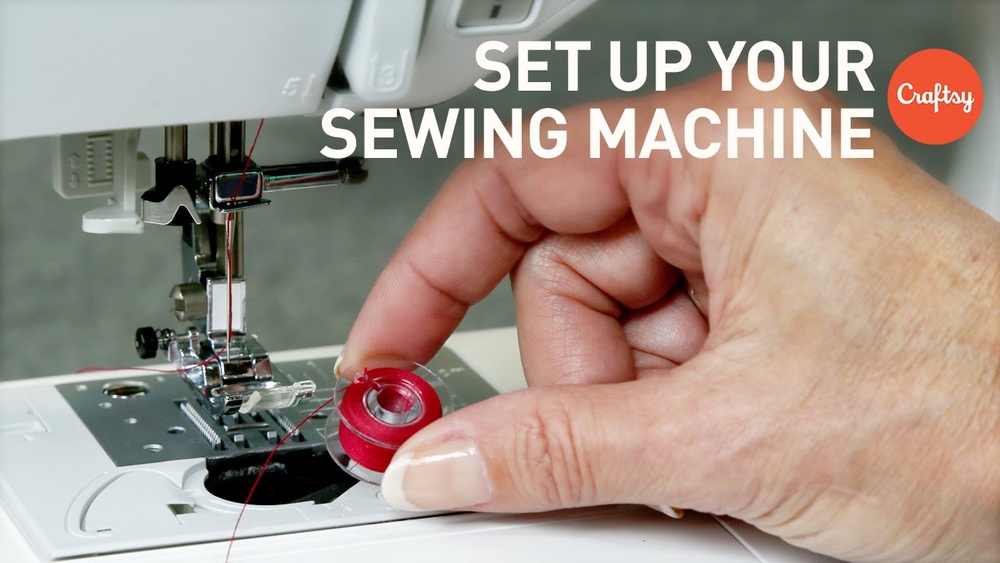
Place an empty bobbin on the bobbin winder spindle. Push the thread from the spool to the bobbin. Wrap the thread a few times around the bobbin. Engage the bobbin winder by pushing the spindle to the right. Press the foot pedal gently to start winding. Stop when the bobbin is full and cut the thread.
Selecting Needles And Threads
Selecting the right needles and threads is key for sewing success. Using the wrong type can cause fabric damage or broken stitches. Choosing needles and threads that match your fabric helps your project look neat and last longer.
Needle Types And Sizes
Different fabrics need different needles. Sharp needles work well for woven fabrics. Ballpoint needles are better for knits. Sizes range from very fine (60/8) to thick (110/18). Thin fabrics need small needles. Thick fabrics need bigger needles. Always pick the needle based on fabric type and thickness.
Matching Thread To Fabric
Thread should be strong but soft. Cotton thread fits natural fabrics like cotton or linen. Polyester thread suits most fabrics and is strong. Silk thread works well for delicate fabrics. Choose thread color close to your fabric. This helps stitches blend in. Avoid thick thread on thin fabric to prevent puckering.
Replacing Needles Safely
Turn off your sewing machine before changing needles. Loosen the needle clamp screw carefully. Remove the old needle straight down. Insert the new needle with the flat side facing the back. Push it up fully and tighten the clamp. Check the needle is secure before sewing. Replace needles often to avoid breaks and skipped stitches.
Mastering Basic Stitches
Learning the basic stitches is key to using your sewing machine well. These stitches form the foundation of most sewing projects. Knowing how to sew straight and zigzag stitches helps create neat and strong seams.
Understanding stitch length and width settings improves your sewing quality. Adjusting these settings fits different fabrics and sewing needs. Let’s explore some simple stitch techniques you can start practicing today.
Straight Stitch Techniques
The straight stitch is the most common stitch on a sewing machine. It sews a straight line of stitches. Use it for joining two pieces of fabric together.
Keep the fabric steady and guide it slowly. Don’t push or pull the fabric. Let the machine feed it evenly. Practice sewing straight lines on scrap fabric.
Zigzag Stitch Uses
The zigzag stitch moves side to side instead of straight. It is useful for finishing edges to stop fraying. You can also use it to sew stretchy fabrics.
Adjust the stitch width and length to fit your project. A wider zigzag covers more area. A narrow zigzag works for delicate fabrics. Try zigzag stitching on fabric edges for practice.
Adjusting Stitch Length And Width
Stitch length controls how far apart each stitch is. Short stitches are strong but can pucker the fabric. Long stitches are good for basting or gathering.
Stitch width changes how wide a zigzag stitch is. Narrow width gives a fine line. Wide width creates a bold zigzag. Experiment with these settings to see their effects on your fabric.
Maintaining Proper Machine Tension
Maintaining proper machine tension is key for smooth sewing. It keeps stitches even and fabric neat. Without good tension, stitches can look loose or tight. This can cause thread breaks or fabric puckers. Regular checks help keep the machine running well. Understanding tension settings saves time and effort.
Identifying Tension Issues
Look closely at your stitches. Loose stitches show loops on the fabric’s underside. Tight stitches pull the fabric and cause puckers. Uneven stitches mean tension is off balance. Thread breaks or skipped stitches also signal tension problems. Check both sides of the fabric for clues.
Adjusting Upper And Lower Tension
The upper tension dial controls the top thread tightness. Turn it slightly to fix loose or tight stitches. The bobbin controls lower tension. Adjusting the bobbin case screw changes the bottom thread tension. Small turns make big differences. Test on scrap fabric after each adjustment.
Troubleshooting Common Problems
Thread tangled under fabric? Upper tension may be too loose. Fabric puckers? Upper tension might be too tight. Thread breaks often? Check tension and thread quality. Stitches skip? Clean the machine and check tension. Keep the machine clean and well-oiled to avoid issues.

Credit: www.youtube.com
Guiding Fabric Correctly
Guiding fabric correctly is a key skill for sewing. It helps create straight seams and smooth stitches. Handling fabric right makes your sewing project look neat and professional.
Controlling fabric while sewing helps prevent mistakes. It also keeps the fabric from bunching or stretching. Good guiding gives you more control over your sewing machine and fabric.
Holding And Moving Fabric
Hold the fabric gently but firmly on both sides of the needle. Use your hands to guide the fabric straight without pushing or pulling. Let the sewing machine feed the fabric at its own speed. Move the fabric slowly and steadily to keep the stitches even.
Using Presser Foot Pressure
Adjust the presser foot pressure based on your fabric type. Soft fabrics need less pressure to avoid marks or stretching. Thick fabrics need more pressure to feed evenly. Check your sewing machine manual for how to change this setting.
Avoiding Fabric Puckering
Fabric puckering happens when fabric gathers or wrinkles under the stitches. To avoid puckering, use the right needle size for your fabric. Choose the correct thread tension and test on scrap fabric first. Guide the fabric smoothly and do not pull it while sewing.
Advanced Sewing Techniques
Advanced sewing techniques help improve your skills and project quality. They allow you to create professional-looking garments and crafts. Learning these methods takes practice and patience. Focus on one technique at a time to avoid feeling overwhelmed.
Sewing Curves And Corners
Sewing curves and corners needs careful control of the fabric. Slow down your machine speed for better accuracy. Use shorter stitches to follow the shape smoothly. Pivot the fabric gently at corners to keep the stitch line sharp. Practice on scrap fabric before sewing your final piece.
Creating Decorative Stitches
Decorative stitches add beauty and detail to your projects. Many machines have built-in stitch patterns to choose from. Test stitches on fabric scraps to see how they look. Use different thread colors to enhance the design. Keep your fabric flat and steady for clean stitches.
Seam Finishing Methods
Seam finishing prevents fabric edges from fraying and falling apart. Common methods include zigzag stitch, pinking shears, and serging. Zigzag stitch is easy and works on most fabrics. Pinking shears cut a zigzag edge that stops fraying. Sergers trim and finish edges quickly for a neat look.

Credit: www.youtube.com
Maintaining Your Sewing Machine
Maintaining your sewing machine keeps it working smoothly for a long time. Regular care stops problems before they start. It also helps your machine sew better and faster. Simple steps can protect your machine from damage and wear.
Regular Cleaning Routines
Clean your sewing machine after every few uses. Remove lint and dust from the bobbin area and feed dogs. Use a small brush or soft cloth for cleaning. Avoid using water or harsh chemicals. Keep the machine free of thread scraps and dirt. This prevents jams and stitch problems.
Lubricating Moving Parts
Oil the moving parts to reduce friction and wear. Use sewing machine oil only, never other oils. Apply a drop on metal parts that rub together. Follow your machine manual for oil points. Wipe off any excess oil to avoid stains on fabric. Proper lubrication keeps the machine quiet and smooth.
Scheduling Professional Servicing
Take your machine for professional checkups once a year. Experts clean and adjust parts you cannot reach. They fix worn parts and tighten screws. Professional service extends your machine’s life. It also improves stitch quality and prevents bigger issues.
Frequently Asked Questions
How Do I Thread A Sewing Machine Correctly?
To thread a sewing machine, start by winding the bobbin. Follow the machine’s threading path carefully. Ensure the thread passes through all guides and tension discs. Finish by threading the needle from front to back. Proper threading prevents thread jams and ensures smooth stitching.
What Type Of Needle Suits Different Fabrics?
Use universal needles for woven fabrics and ballpoint needles for knits. Heavy fabrics like denim need thicker needles. Delicate fabrics require fine, sharp needles. Choosing the right needle prevents fabric damage and ensures clean stitches. Always change needles regularly for best results.
How Do I Adjust Sewing Machine Tension Properly?
Set the tension according to fabric thickness and thread type. Test on scrap fabric first. Tighten tension if stitches loop on the bottom. Loosen tension if thread breaks often. Proper tension balance creates even, strong stitches without puckering.
What Maintenance Tips Keep A Sewing Machine Running Smoothly?
Clean lint and dust regularly from the bobbin area and feed dogs. Oil the machine as recommended in the manual. Replace needles frequently. Cover the machine when not in use. Regular maintenance extends machine life and improves stitch quality.
Conclusion
Using a sewing machine takes practice and patience. Start slow and follow each step carefully. Keep your machine clean and check the thread often. Always use the right needle for your fabric. Take breaks to avoid mistakes and stay focused.
Sewing can be fun and help you create many things. Remember, every small project helps you get better. Keep trying, and soon you will sew with confidence and ease.